

It all started a few days ago when he was at the park with my mother and daughter. They had stopped at Wendy's to get some lunch and Jarod had also chosen a Frosty. He had been playing at the park and picking up almonds (or was it walnuts?) off the ground for my mother to use in a pie. Duh! It was pecans! Anyway, he stopped for a minute to go eat a few bites of that cold confection that had been left in the car while he played. According to the reports from my mom and daughter, he started complaining of his lips burning and itching soon after. His lips were also very swollen and his mouth area of his face a bright red (a difficult task for my brown children who are half Filipino). By the time he got home that afternoon, his lips were still swollen and red and he was still complaining of the burning. After we warned him of the dangers of anaphylaxis (not a pleasant topic for a sensitive 11 year old child), he went off to bed with some allergy medicine. When he awoke the next morning, the burning was gone. His lips were still somewhat swollen, but it was vastly improved. Until later that day when he and I enjoyed a bowl of (Sugar Free) Rocky Road Ice Cream. I could literally watch his lips swell and face turn red. He wasn't about to let that keep him from finishing that yummy ice cream, though. It was at this point that I decided we had better call his doctor. They couldn't get him in until 3:50 pm the next day. Oh, boy!
The burning and itching didn't go away this time. So, (unbeknownst to me) he decided to start keeping a wet towel on his mouth from bedtime and beyond. Yesterday (day 3) my daughter and I went to run errands with my mother and he wanted to come along. The miserable little thing was still carrying his towel. After we made one stop we went to Bojangles to get the kids some breakfast. Cajun Filet Biscuit Combo with Seasoned Fries and a Dr. Pepper for daughter ordered. Jarod seconded the order. It was at this point that I turned to ask him if he thought he would be able to eat something so spicy with his burning lips. I looked at him and it finally dawned on me that he had that towel held to his (now bleeding) lips. He was crying because he realized he couldn't have his favorite breakfast and opted instead for the Bo-Rounds (which he still couldn't eat). I felt like such a heel when I had to tell him he couldn't hold that towel to his lips. Now, he was really upset. We stopped at Weaver Street Market to pick up a tube of Calendula Cream (on recommendation). He had tried some chap stick, but that made the burning worse. I portioned out some of the new stuff and as soon as he applied it, he was crying and probably would have screamed if his lips weren't hurting so much that he could no longer speak without pain. After wiping that off, we allowed him to wipe his mouth with the damp cloth whenever it became unbearable. Poor thing had tears in his eyes that entire day. Finally, it is time for the doctor appointment. I had prepared him for the eventuality that they might want to draw blood, but even that was not as upsetting to him as the pain.
The doctor is not sure what caused the problem and doesn't think it is an allergic reaction due to the localization of the issue. He prescribed a special concoction called Magic Mouthwash and was thrilled to hear that I knew how to make lip balm or butter that we could keep all color, scent and sweeteners out of the concoction. Now, if you have never heard of this stuff called Magic Mouthwash, allow me to enlighten you. It is a compound medication (meaning insurance doesn't cover it) and no two doctors have the same formulation (or so it would seem). It usually consists of three ingredients. The most common formulation involves Mylanta, liquid Bendaryl and Nystatin (an antibiotic, I think). Jarod's formulation added Lydocaine, Prednisone and Distilled water (since it would be spread on his lips and swished in his mouth). Now, this stuff works well, (from what I hear) and is frequently prescribed for adults for thrush. However, the stuff smells nasty and (I am told) tastes worse. (Keep it refrigerated, it seems to make the taste more tolerable.) The doctor used it in this case to hit anti-fungal and anti-bacterial culprits as well as acting as a numbing agent and reducing the swelling.
So, now we need to address the chapped lips and surrounding skin with something as pure and gentle as possible to avoid making the burning worse. In walks the need to move this task from back burner to high priority. I checked the net and Pinterest for recipes and found several that looked promising for when I wanted to make some with flavoring. Finally, I found a recipe that was short and could easily be altered to accommodate our needs. I found the recipe on a blog called Life Ann Style here. She also has a really great video to show how easy this stuff is to make here. I did have to alter the recipe a bit, but at least I had something to springboard from. Now, to provide our alteration of the recipe and pictures. Stay tuned at the end for a couple of lessons we learned while making this lip butter.

Simple and Pure Moisturizing Lip Butter
Utensils needed:
Measuring Spoons
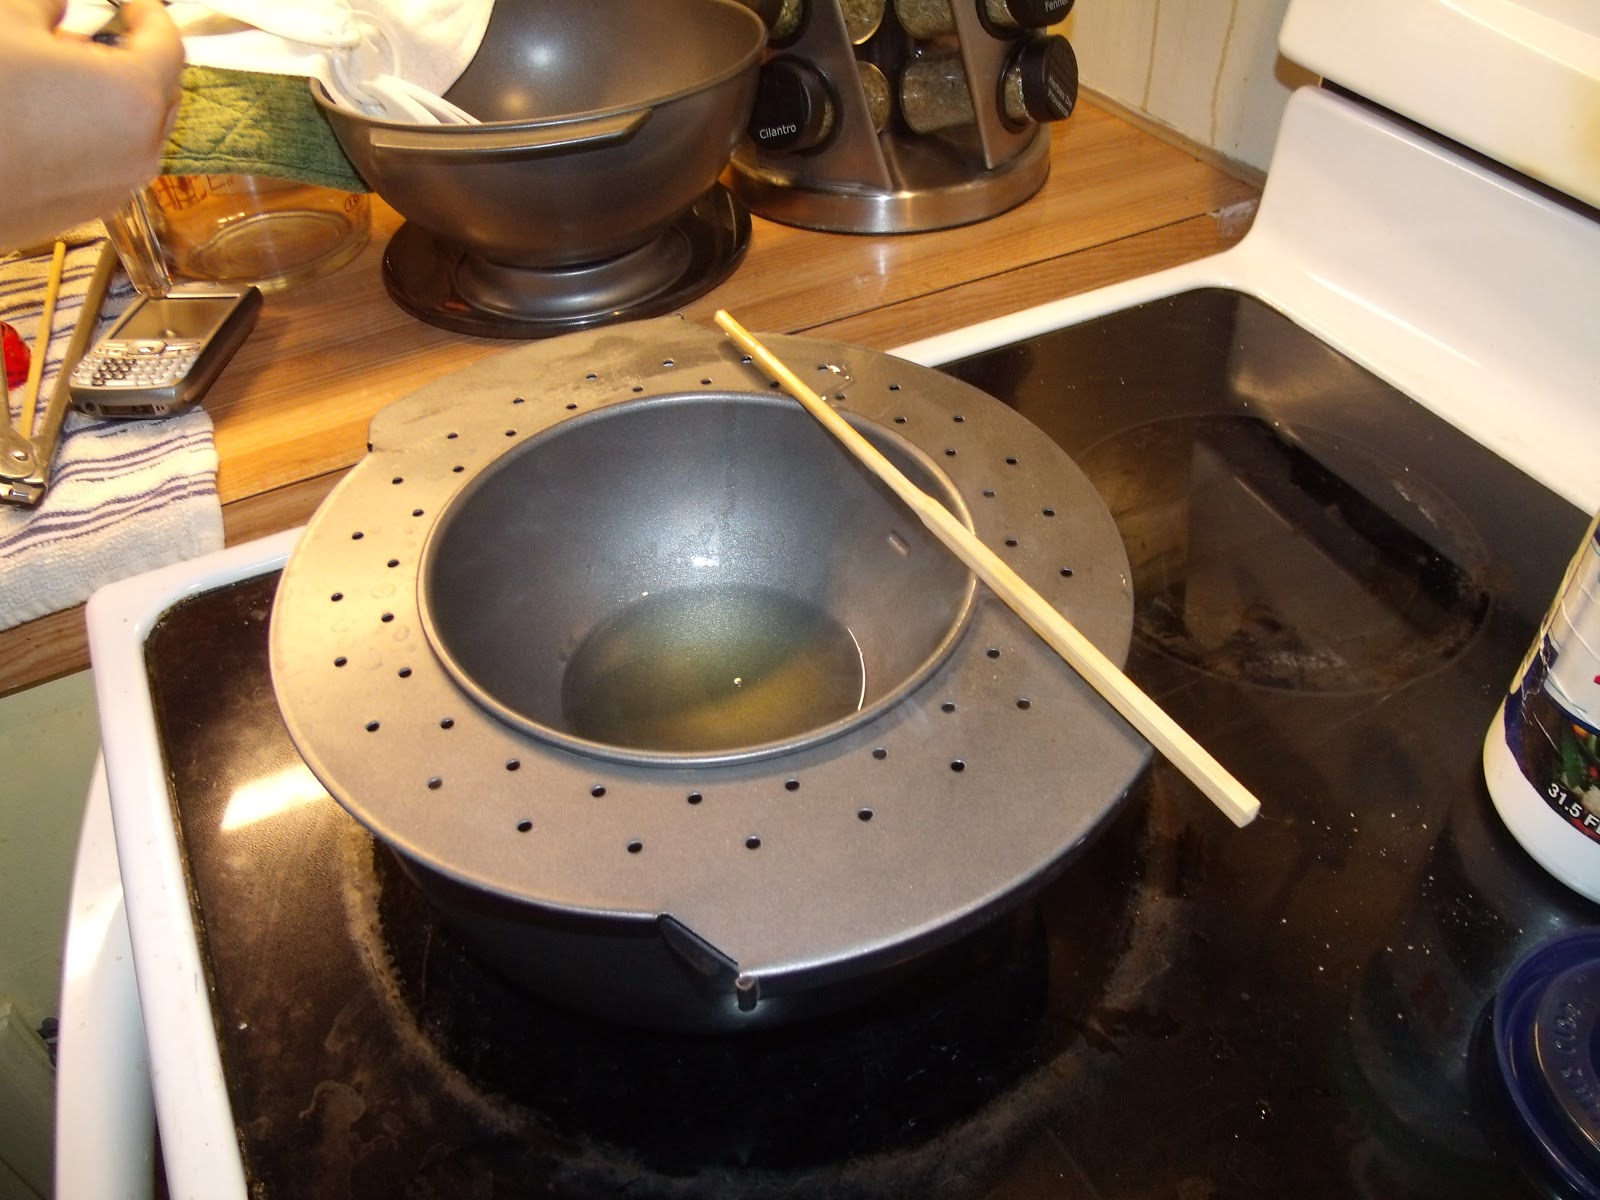
Double Boiler, Bain Marie or a heat safe glass measuring cup in a water bath
Stirring Implement (we used a disposable chop stick)
Ladle (if you didn't use the measuring glass option)
Clean, Sanitized, Empty Containers with lids* See note below about this.
Ingredients:
3 tsp food grade wax (I used beeswax but soy wax is fine too - and is supposed to be easier to clean)
3 tsp coconut oil (I put mine in a hot water bath to melt down and used liquid measurements here)
2 tsp almond oil
1 tsp Vitamin E oil (use pure vitamin E oil if you can, otherwise check ingredients and buy a version with as few ingredients as possible and make sure all ingredients are edible)
1 tsp olive oil
How to do it:
Place all ingredients in double boiler (or Bain Marie or glass measuring cup) over medium heat.


Stir until melted. Try not to let the water boil so water doesn't spray up or splash into the oil and wax.
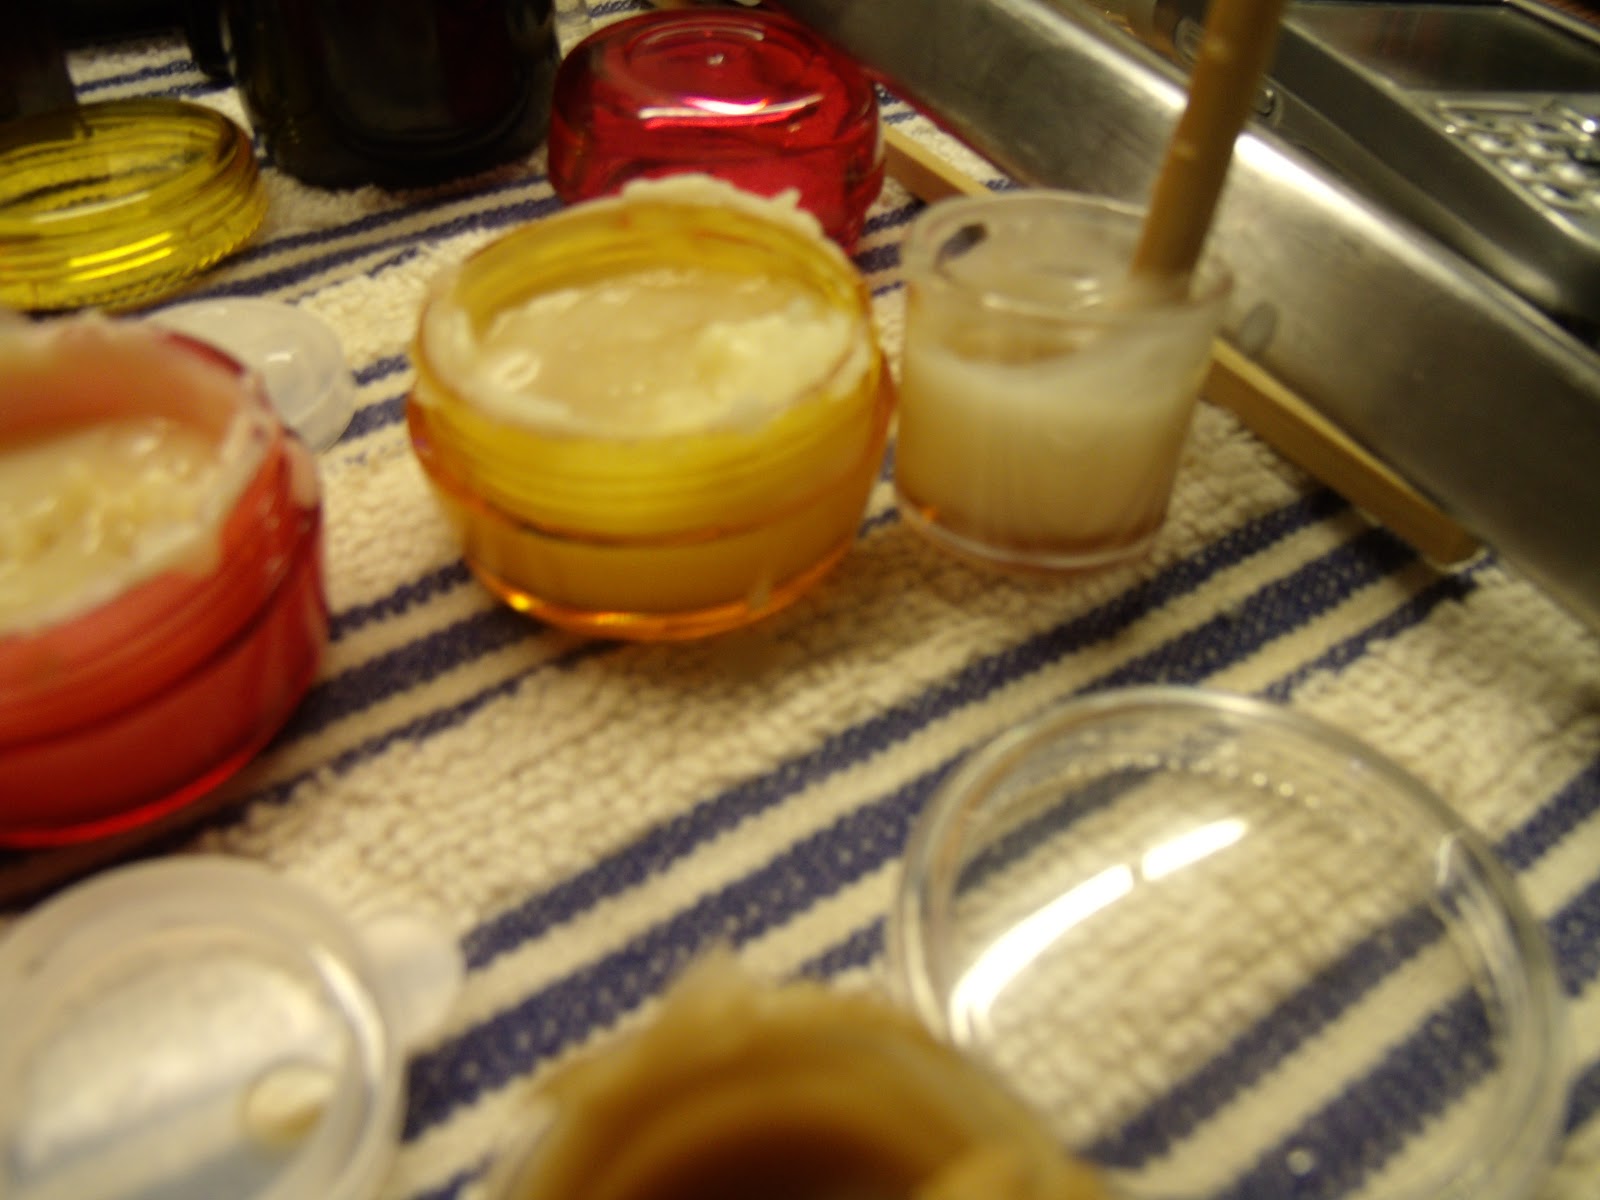
Once melted, ladle into the empty and sanitized containers.


Allow to set, it doesn't take long. Place lid on container once set.
You can begin to use this immediately. Do not keep the finished product where it could get too warm (like your pocket) as it will soften the end product. Unless, of course, you prefer it softer. You can add more wax if you prefer a more stiff balm that you can pour into chap stick tubes or containers. Use less wax if you prefer a softer end product.
Variation (adding sweetener and flavors):
We tried using Agave Syrup and liquid extracts to sweeten and flavor the balms. We found that agave syrup doesn't mix well with the oil or wax so added 3 tsp of emulsifying wax to help counteract this problem. We used 1 tsp of syrup and about 10 drops of the liquid extracts. The extracts were placed into the containers so that we could make several flavors in one batch. The syrup was poured into the double boiler with the oil and wax. Even with emulsifying wax we found the agave syrup was prone to settle at the bottom and the extracts did the same. We stirred the butter in each pot as it solidified and then smoothed the top once it began to get stiff. We still had some extract/syrup settle at the bottom but it does smell good. We will look for other options next time. Meantime, maybe you have tried this and have an idea of how to overcome this problem!
Lesson Learned about Sanitizing Containers:
I had purchased some small and medium size pots with lids from the crafting section of Dollar Tree. They look like those little paint pots you get in a sun-catcher kit, only bigger and, well, emptier. I figured these would be the perfect container to use for this project and had been holding onto them for some time (darling husband likes to use them for pocket pill containers, too). I got to thinking about how I needed to keep everything as sanitized as possible. I was already boiling the top of my double boiler along with the measuring utensils and the ladle I planned to use. I figured I would just toss those pots and their tops into the boiling water for a few minutes so that they would also be sanitized too. Well, I can tell you now...don't boil them. Those little pots came out of the water in such a warped state that I was actually tempted to make some type of art deco piece out of them. Seriously! Don't do it.

I had to turn everything off, cover everything and then get DH to run me to the Dollar Tree to pick up some more. They only had one pack of the small containers left in stock. Oh, no! What was I going to do? So, I had DH run me to Wal-Mart (thankfully they are in the same parking lot) so that I could go search the store back to front for more containers. I finally settled on the ones you can get out of the travel size section in the pharmacy. At 2 for $1 I had to wince as I picked up four packs. The other ones came 6 to a pack for $1. I figured the gas to get to the next closest Dollar Tree would be more than $4 so I bit my lips and bought them. Good thing we were making lip butter!
We hope you have found this recipe and information enlightening,
Mistie and Michael, the Crafting Kelleys
OH! I almost forgot! One more thing...we need someone to identify this set of equipment for us. I found it at Goodwill yesterday and am using it as a double boiler. I am a bit confused by it, though, because of the third (and middle) part that came with it. The handles of the "double boiler" piece lock onto the pot or onto the other piece. The other piece reminds me of a colander without the holes. I am game for calling it a double boiler because the other two pieces make sense to me. It's that third piece that confounds me. What could it possibly be good for? It is metal, so not microwaveable. I almost thought it could be another pot but it has that blasted foot on it. Then, I considered that maybe this set is a double boiler/Bain Marie but the handles of that Unidentified Object do not lock onto the bottom pot. And if the middle pot is the top part of a Bain Marie, then why does the handles of the double boiler lock onto it? Anyone?

No comments:
Post a Comment